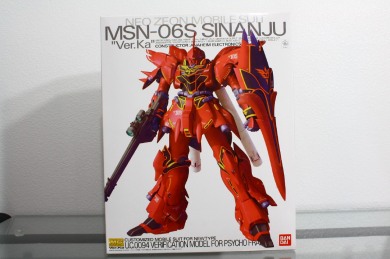
This is the Sazabi-like mobile suit piloted by none other than a Char in the Gundam Unicorn novel. It was love at first sight with me for this MS. Oh how I was so happy when I first heard that the Sinanju would finally be getting the MG treatment… until I learned that my worst fear came true: the gold trims are all foil stickers. The offensive gold foil sticker for Unicorn’s v-fin was understandable but foil stickers all over Sinanju’s body is a felony! Damn Katoki and Bandai for not willing to fork out the extra plastic for actual gold pieces despite the rather hefty price tag (~6000 yen). Nonetheless, I was determined to paint this model because I know the foil stickers will not do for me so I started on it soon after receiving it.
Notes
– Paint used: Tamiya Gold Leaf, Clear Red, Flat Red, Dark Gray, and Clear Green. One bottle of gold is plenty enough. Everything is handbrushed.
– Top coat is Mr. Hobby Flat Coat
– Sinanju does not come with a stand.
– This model can cost you between $65-$75.
– You can buy everything at rainbowten.co.jp, hlj.com, or 1999.co.jp.
– Any procedure questions, refer to “My Tools” page please.
– For painting tips, refer to this post.
– For convenient comparison, here is Dalong’s Sinanju Review.
Out of the Box
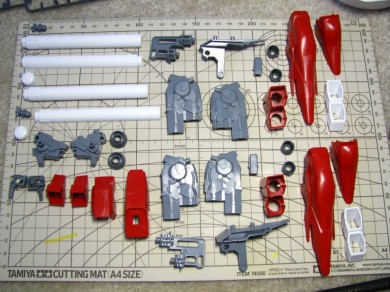
22 runners in all. Most of them are doubles of the same runner and some are just dedicated to one smaller part of the model so it’s really not that overwhelming. Springs are included for the power tube gimmick. There are NO CLEAR STICKERS in this kit so you will have to rub on each and every one of the marking decals :D (if you don’t pick up a set of water transfer decals). As you can see, that hideous gold foil sticker sheet is also disgustingly huge.
See… that’s just ridiculous. Just the wrist itself has five different foil stickers. Also imagine rubbing on every marking on that decal map ^^;
Preparations
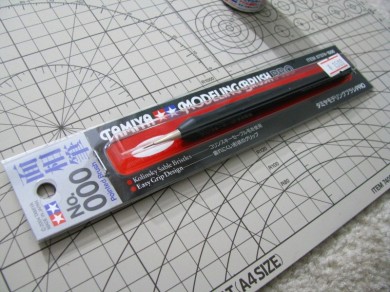
My brush and gold paint of choice. A bunch of skewers, cotton buds, and rubbing alcohol will come in handy too for obvious reasons.
As you can see, masking tape isn’t very effective for the parts that need painting. The raised parts are just too subtle to mask. Just gotta make do with painting as neatly as possible then clean up afterwards. If you really are that good with micro-masking then by all means, go for it.


This runner pissed me off a bit. The pieces on this runner are supposed to be gold but Bandai gives it to you in yellow. So if you use the gold foil route, you’ll have this mix of yellow and gold trim on your Sinanju… which brings me back to the question of why didn’t they provide the rest of the should-be-gold parts in yellow as well? Anyway, you can basically dip or spraypaint this whole runner in gold. Nothing is yellow on the Sinanju.
The Body
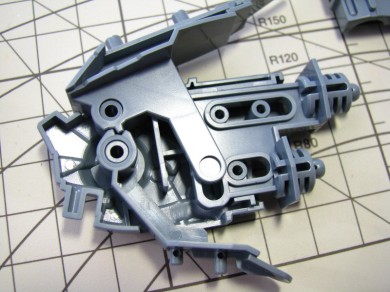
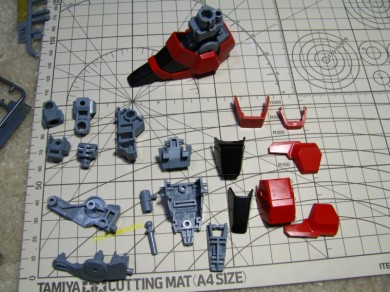
Forgot exactly how long it took me to paint that emblem but it was LONG… and the rest of the pieces that need to painted gold also took just as long! Just be patient and go slow so there won’t be so much to clean up afterward. This is the first step of a long and annoying journey. The other annoying part is cutting off those little tube pieces and cleaning off the nub marks (they are big). Assembly is straightforward.
Head
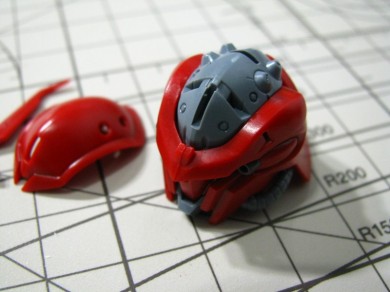
Painted in the vulcans on the front of face with Tamiya dark gray. Easy part and luckily, no gold. Unfortunately, there’s one atrocious nub in the middle of the left side of Sinanju’s horn. You won’t be able to hide that thing just by sanding; you need to paint it away. I painted the eye but realized how pointless that was because you can’t see the eye anyway.
Arms and Hands
The engineering in the arms is worth praising. No nonsense. No unnecessary parts. All the sliding parts are simple yet actually serves a purpose. The arms are probably the most articulated in the MG line-up thus far. The wrist and forearms also extends. While all the fingers can bend, the last three are attached to each other. It doesn’t limit hand posing much so I didn’t bother cutting them apart. You can make the wrist look silly with five different gold foil stickers or paint it in. The latter is relatively easier compare to other parts.
Shoulders
Good part: Quick and easy assembly. Bad part: the nub marks are on the front of the shoulder where it curves! It’s so hard to clean it up without damaging the actual piece.
Thrusters
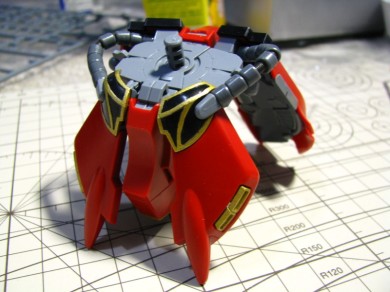
More to praise about the engineering here. Pull out the thrusthers and the “shells” open up with it. Simple yet gets it done. The fuel tanks are so long that it leaves a very visible seamline… wish I could fill it in and sand it away.
Waist
Sinanju’s waist is more sophiscated than your average MG waist. The sliding mechanics is similar to that of the RX-78-2 Ver. OYW/Shin Musha Gundam but this one allows each leg to individually slide forward and back. Nice! Not so nice: damn tube pieces again… so tedious…
Legs and Feet
In terms of assembly, this part is the most time consuming (just look at the number of parts). Like the arms, the legs are also straight to the point with its mechanisms. I can see how articulated the legs are just from assembling them. While the feet can’t really bend forward or backward, the ankles can roll free enough to still allow the feet to stand flat even in wide ground poses.
Shield
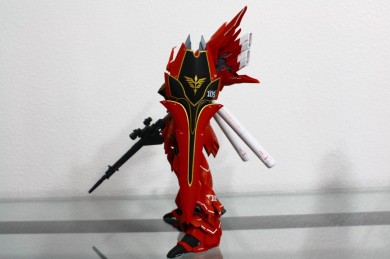
The shield is THE most troublesome part to paint. The edges are on the red part are rounded so it’s very difficult (see: impossible) to paint or clean neatly. Not to mention it curves, so masking will also be a nightmare. What I did was just paint the gold foil in my gold for the red part and stick it on (this is the ONLY part I used foil stickers on). The gold on the black isn’t as annoying but can still get on your nerve after awhile. It’s also easy to miss some spots too as the shield is curved so I had to look it at from different angles to make sure I covered everything.
Weapons
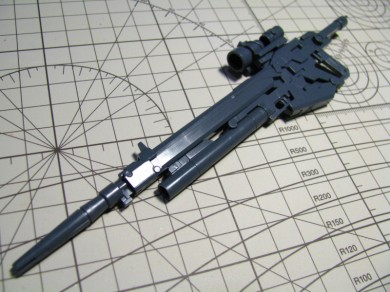
While it’s nice that Bandai finally starts providing the clear parts in the right color, I find the green to be too light so I painted it a darker clear green ^^;. There aren’t many pieces to the Beam Rifle and grenade launcher(?) but more than the usual two-halves beam rifles. As expected from katoki’s design, Sinanju’s beam rifle is sleek and beautiful but I prefer Unicorn’s beam magnum more ^^;. What’s with the double scope?
The Getter Sinanju’s Tomahawks are the simplest to assemble, barring the beam saber hilts (which you just snip them out from the runner).
Second Project- Water transfer decals
I STRONGLY recommend picking up Sinanju’s water decals and a bottle of Mr. Mark Setter (it “melts” the decal to the plastic). It saves a ton of time and more importantly, headaches. I don’t know the exact number but I’m sure there are about 250+ decals to complete the whole decal map in the manual. If you screw up a dry transfer decal, then that’s the end of it. With water decals, you can play around and adjust it until you find it perfect. Still, it’s not that much easier even with the water decals. You see… Sinanju’s entire body is either rounded, angled, bent or curved- basically anything but straight. There are no real flat spots so making sure the decals are straight, leveled or symmetrical is a real pain in the buttock. I can see those with Gunpla OCD going insane making sure the decals are uniform together… or banging their head on the desk after spending a lot of time to make sure the dry decal is applied perfectly just to see that it’s misaligned with the other one afterwards. This is how the sheet of water decals looked afterwards…
Note that if you plan on spraying top coat on your model, you should really make sure the water decals are completely sticking to the plastic. There shouldn’t be any air bubbles and whatnot (you can see it). Air bubbles aren’t an issue with tiny markings but could happen in bigger ones. Mr. Mark Setter helps in making the decal stick but there’s still a slight possibility part of the edge is not sticking and top coat can get in. If you spray top coat on some markings that has air bubbles or opened edge, the top coat can wrinkle or break the decal. It happened to a few on my Sinanju but I was able to replace them with the dry transfer.
Top Coat
This is the top coat (Flat/Matte) I used on Sinanju. For a thorough job, I say Sinanju alone can eat up the whole can. If you want to make sure you’ve every corner covered, I recommend that you spray each part layer by layer (example: spray inner frame of arm, put armor on then spray again, put whatever is left and spray again). Yes, this is more time consuming and waste a lot of the precious chemical but it’s worth the effort. Sinanju has a lot of overlapping armor parts so if you just spray the entire part at once then you’re bound to miss many spots. I know this sound a bit crazy but… I think Sinanju would look better with Semi-flat top coat than completely matte. Sinanju’s red is rather vibrant like it’s meant to be a little glossy (and I don’t mean plastic gloss) and flat top coat just seems to make it look dull. I’d say semi-gloss would do a better job of bringing out Sinanju’s true beauty. Also, I don’t know how it does it but it does… the flat coat makes the Gold look VERY NICE and solid! Can’t really describe that part but the pictures below can show you ^^;.
SD Sinanju Ver. Kamina
Just messing around :)
Sinanju before decal work and top coat
Shiny isn’t it?
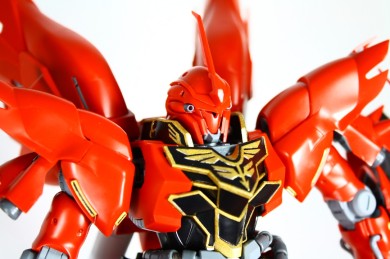
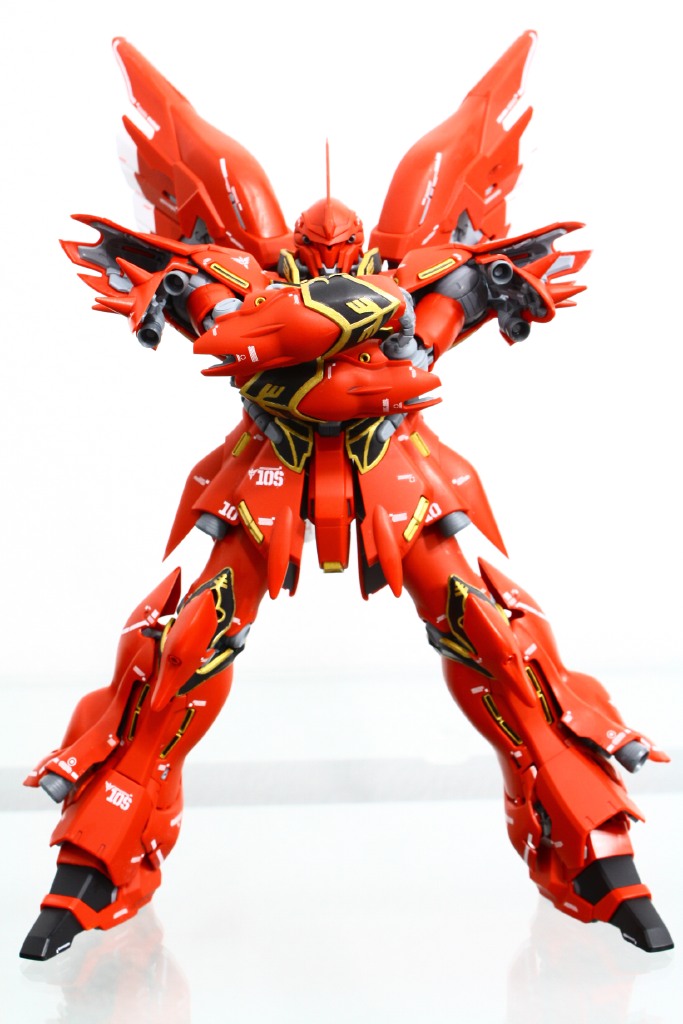
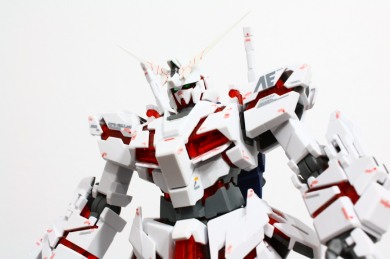
Sinanju- The completed model
The decal job took me almost a whole week (a good few hours each day) to complete. I wonder how exactly does Katoki expect the average gunota to apply some of the dry transfer decals perfectly. Just look at the white stripes near the ankle and thrusters- they go around curves! Some even goes right on top of a bump! It just seems VERY obnoxious. I bet you Katoki never tested out the placements of the decals he designed for this model…


Can’t say I’m too satisfied with the final result given the work I’ve put in. Not on the model’s part but rather on my lack of experience. It didn’t turned out as clean as I wanted it to be. The top coat exposed some of the blemishes on parts that I cleaned up after painting and the residue of excess Mr. Mark Setter. I also screwed up when spraying the top coat because it was so cold outside that some parts frost up. I cleaned it off with rubbing alcohol and reapplied the top coat. You can see it only if you try real hard to look for it (at that point, you’re not really looking at the model). Some decals were eaten away by the top coat so I had to reapply them with the dry transfer but luckily, that turned out well. Many first time mistakes but overall, nothing that really wrecks the final result to the point where I want to redo the entire model ^^;. The pictures can speak about the details and proportions for itself ^^.
Sinanju is the next tallest model under Sazabi (not sure now it compares to the Ex-S though). Even with that size, Sinanju can stand bold and proud. Its stance is very solid and well-balanced. This is one of those mobile suits that can look elegant and sophisticated just standing there.
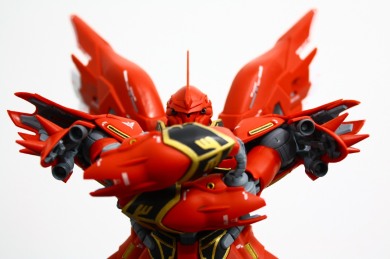
One of the most awe-inspiring pose that Sinanju can do. Simply badass.
HAND-TO-HAND COMBAT
MUGEN SINANJU PUNCHHHH!!!
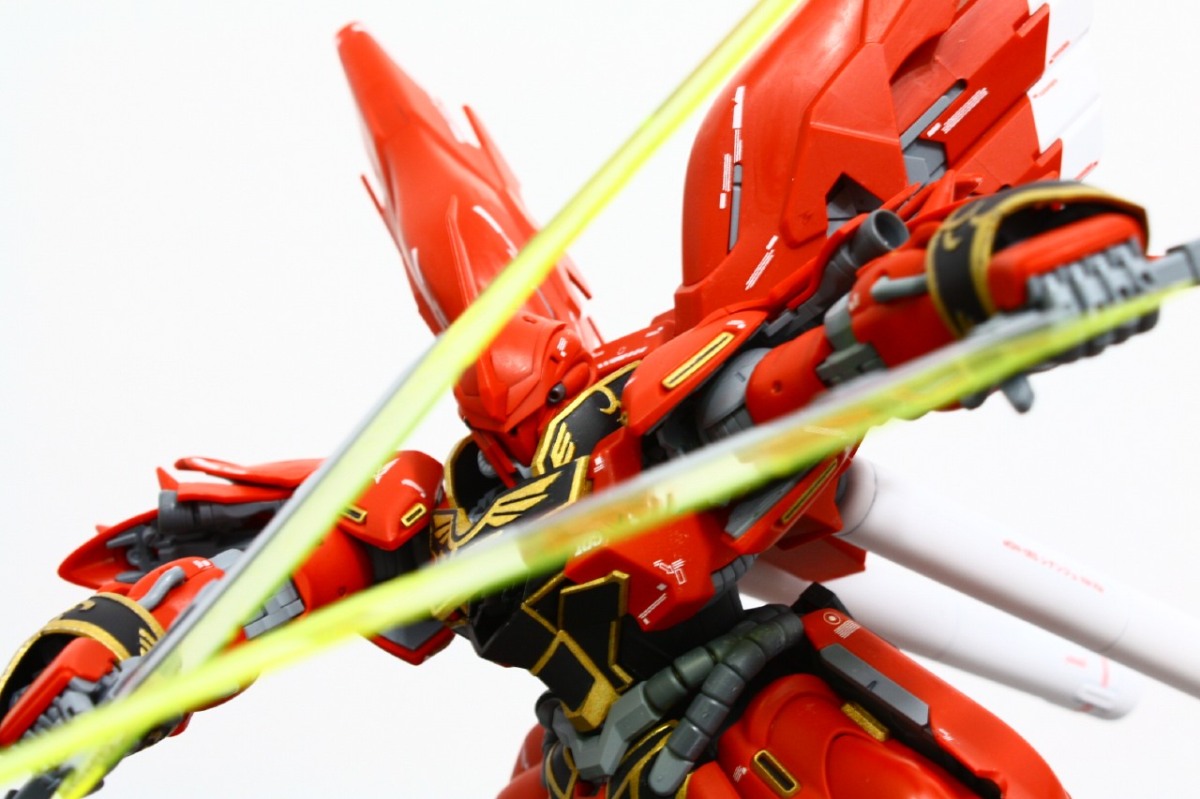
SABER DANCE
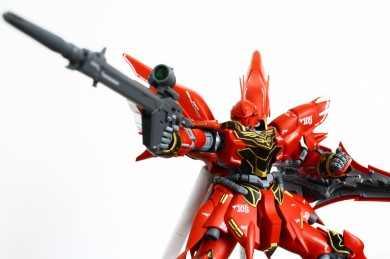
ACE MARKSMANSHIP
My favorite shot:
OFFENSIVELY DEFENSIVE
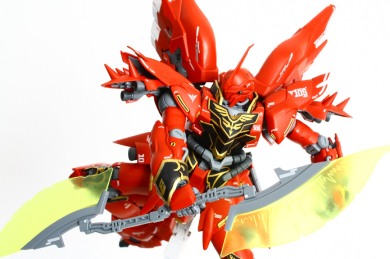
GETTER SINANJU TOMAHAWWKU!
SINANJU TOMAHAWK LANCER
SLASH!
Drifting in space…
FULL FRONTAL ATTACK
THE BATTLE CONTINUES…
…swear I’ve seen this sword design somewhere before (Halo?)…
I don’t suppose this can really work like Kyrios’ claws…
More beam saber action
Infinite Justice Sinanju
Articulation
As you can see, the Sinanju is very well articulated and poses VERY well despite its size. It is definitely one of the most dynamic MG produced by Bandai so far. Its wide range of motion are supported by solid joints that does a fine job of holding the model in its stance. No weight issues either since the backpack is light. The sliding parts in the waist is certainly more useful implemented here than in the RX-78-2 OYW model. The joints are very sturdy; even after the photoshoot, Sinanju is still very solid and there are no loose parts. After playing with Sinanju for awhile, your sense of size might get skewed a little as all other smaller MG feels VERY small afterward. So not only does the Sinanju can look elegant just by standing, it can also be just as impressive by striking a pose. Any pose.
俺を誰だと思ってやがる!!!
RANTS
Of course, no models escape without some bashing. Fortunately, Sinanju doesn’t have very much for me to bash on.
-My biggest gripe with Sinanju is its hands. I hate its hands. The fingers are loose and weak; the hands can barely hold any of its weapons with or without them plugged into the palm.
-The beam rifle looks great but the slot on the handle that plugs into the palm is awkward like it sits too far in towards the wrist; it is not easy to get Sinanju to hold its beam rifle and I have to fiddle with the hands most of the time to get it to hold properly, sometimes even needing to remove the hand to attach the beam rifle. Also not to mention the beam rifle is on the heavy side so it tends to fall off of Sinanju’s weak hands. Posing with the beam rifle was the hardest part of the photoshoot.
– While there aren’t really any parts obstructing each other, many parts do tend to rub and grind on each other. Shoulders, elbows, wrist, leg thrusters, knees, ankles and waist just to name a few. They don’t obstruct nor are they obstructed but grinding on other parts can easily (and it does) scratch the top coat and in worst case scenario, messes up nearby decals. I accidentally messed up a few decals from posing but nothing major.
– In general, nub mark placement and coverage are very nice and courteous of Bandai. However, there are quite a few that are just RIGHT THERE and outright hideous. Total opposite spectrum. Such as the big one slapped in the middle of the left side of Sinanju’s horn. Then you have those that sits on a curve like on the shoulder and parts of the leg. Actually, most of the hideous nubs are on the legs… and the power tubes. I’d say nub marks aren’t as much of a concern in this model as there are bigger things to pay attention to.
– What is wrong with the shield?! It doesn’t even clip properly onto the forearm AND damages the part. It’s loose and easy to knock off while posing. Forget about clipping it onto the shoulder piece. It’s absolutely pathetic; the piece from the shoulder can’t even support the weight of the shield so it just flops. Not to mention it doesn’t even have any real functional effect since it gets in the left arm’s way. Add the beam effect parts and the shield can become a little too heavy for the arms.
– The gold foil stickers. ’nuff said.
– Felt forced to paint the gold trim. ’nuff said.
LAST THOUGHTS
Let me get this out of the way: this model is NOT FOR THE WEAK-WILLED. That is, if you want this MG to look remotely decent then you will have to put in some elbow grease, put up with some frustration, have some patience and shell out a good chunk of time. You will have to paint and apply the decals otherwise it’s not worth it. At least make an attempt before you decide you can’t do it. You gotta believe in the you who believes in yourself. You have to earn the true beauty of this kit. Neither the foil stickers nor the gold water decals will do Sinanju any justice. The MG Sinanju Ver. Ka exceeds the MG line-up as a model but sorta fails in a way in the detail aspect no thanks to it having the biggest abundance of foil stickers than every other model out there (weren’t MG supposed to be… you know, color accurate to reduce the need of foil stickers and the need to paint?). It might not be as big of a deal if you plan on painting it from the start but it’s still noteworthy to criticize. Other than that, this is a great model with articulation surpassing all the models before it. While I certainly did not enjoy the overall progress (mostly the painting part) of this model too much, I wouldn’t mind attempting at another one if given the chance since it provides a new learning experience and challenge in this hobby. I’d say the Sinanju is worth the money (and the effort).
OTHERS’ REVIEW:
Baby TheEnd’s Gunpla and Toy Review
BD77’s of Fiure and Plamos (HGUC)
Celestial Preventer (HGUC)
…
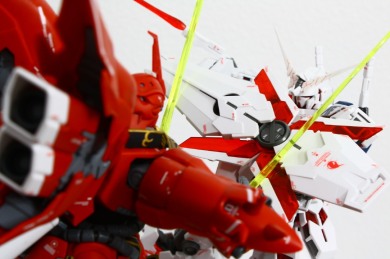
CHAR’S COUNTERATTACK FULL FRONTAL’S RETALIATORY STRIKE































Hey z, I just saw this review and now I’m having trouble deciding between mg sword impulse and mg sinanju ver ka titanium finish…
What would you recommend if I have a lot of free time and like gundam that are posable? I don’t mind painting but I’m not very good at decals ><
i have both sword impulse and sinanju and i’ll vote for sinanju. don’t get me wrong, i love my sword impulse but the sinanju is just so badass!! it was really worth it. although you really have to put some serious effort in painting sinanju. damn katoki made his life easier by making our lives miserable for the sinanju fans. even if you’re not good in decals it’s ok because sinanju looks good with or without the decals.
cruxil you should get the sinanju its very posable and the titanum finish looks better without decals and for me it looks better than sword impulse
Can i use gloss instead of flat top coat//
hey Z. do you plan on getting the sinanju rocket bazooka? i bought 2 of ’em and a gatling gun for my sinanju and IT COST ME A FORTUNE!!! now i also have two unicorn novels lying around in my box of spares. i wanna see how you will treat the bazookas if you ever plan on getting one. i suggest you get two because it looks better with two bazookas on the shield and on the rifle.
nope. As cool as the bazookas might be, the means of obtaining them and the price aren’t exactly worth it.
thats going to be very heavy for those loose sinanju fingers to hold properly :P
it actually is on the heavy side!! haha. the only way for sinanju to hold the rifle with the bazooka under it is to hold it up. sinanju cant hold it horizontally because of the weight issue and laws of gravity. if you mount it in the shield, it would be easier to pose and sinanju can hold a good pose with it. thanks to the “spikes” of sinanju’s shield, you can put it against the side skirt and back thrusters for it to balance.
Your review gave me a better view and approach to this unit. I bought this manry unit 2 years ago but was too chicken to work on it in fear of ruining its beauty… now that I think I’m ready, your review saved me a lot from a major disaster.
What did you paint the gold with? Also do you have any painting tips or tricks for the gold?
Was just wondering since I’m planning on getting this kit.
Z you should buy another MG sinanju and go “all-out” on it..you said that this wasn’t really your best work, that would look amazing if you did all you could for it ^_^
Hey Z, just want to ask what exactly did you use to paint the dark green clear part of your sinanju, i want to use it on my wing zero custom MG. And ofcourse how did you apply, sorry im not an expert when it comes to this.
yes, tamiya clear green most likely done with a brush.
Are you sure about that sir? How about the brush that use, and did you apply it in front alone or the whole plastic?
fairly sure since that’s what he’s used on other kits, brush was probably a tamiya one or any standard brush since there isn’t much of a difference. Most likely whole plastic to make sure the coverage is sufficient as well.
I got a Glow in the DARK POWDER green, you think i can mix it to the TAMIYA CLEAR GREEN?
Sorry i really have no experience with paints etc, just want to ask before applying the tamiya clear green with brush, do you still need to mix it to thinner or other paint to achieve that shiny clear green shown above? And when you said tamiya clear green, are you referring to the tamiya x-25 acrylic paint? PLEASE REPLY and THANKS FOR THE HELP!
if you’re just brushing the little parts then you’ll be fine if you don’t thin it out but make sure to use multiple light coats of paint and give it plenty of time to dry between coats. and yes, the paint you’ll want to use to brush it on is the x-25 clear green.
best of luck!
Can you tell me the function of the THINNER in painting models? Why need to use it?
The function of the thinner is… well, thin the paint. You don’t “need” to use it but if you are paint is old/thick then you can thin it so it is more smooth. Too thin and the paint will be ruined too so be careful.
Thx for the reply sir by the way how much % do you suggest i use for the combination of the THINNER and the PAINT? I got tamiya enamel paint x-20 and clear green x-25, do you think i got the right choice for the orb body armor and arms of my wing zero?
Z, did you really use Acrylic in the clear green part of Sinanju’s rifle? If so, did you add top coat on it like mr color etc after the painting and what did you use Airbrush or Paintbrush? Sorry for plenty of questions, i really like the output of your designs and im really not familiar with painting models so as i lack of equipments, i dont have airbrush. Need answers, thanks in advance.
Well I think I may be ready for this one soon. I’ve built eight MGs as well as two RGs. With painting the gold trim, what did you do when the paint went where it shouldn’t on the part? With tackling this kit I also thought about painting the parts before I put the kit together.
Use a toothpick wrapped with a layer of tissue (so it stays pointy), dip in rubbing alcohol and clean away.
Hey, I’m thinking of getting this model for Christmas, and here’s my question: do you reccomend using gold Gundam marker for all the parts that need it (shield, etc.)
You should use tamiya gold leaf.
Hi there Z, I just got a MG Sinanju Titanium Finish and MG GN-X, any important stuff to take note while building the sinanju? I’ve read all the hideous nub marks and that’s already gonna be a nightmare for me -.- any advice would be very much appreciated!!!
That’s all you need to watch out for, really. And best to get the waterslide… the rub-on decals will be hell for this model.
i was wondering, why does sinanju’s decal says 10S and not 06S?
What is the difference between the clear red and flat read?
Clear Red is transparent red. While flat red is RED.
ohh, i see
why would you need clear red and how would you paint sinanju using those two? do you put flat red and go over with clear red?
and also do i use flat black for the black parts? XD
Hi Z, recently I just got my Sinanju review up, you wanna add the link to your review and check it out too, maybe giving me some advice on areas to improve on! the post should the latest post on my blog. Really hope that you will check it out!!
er.. i just wann ask something, when you paint those ventilators with gold, did you add some thinner with it? amd if so… wat ration did you use?.. thanks for your kind answer ^^
No thinner. Just straight paint.
wew, is that so… then why others say its better with thinner than to go straight, alsdo what mehod did you use to paint the emblems, looks mines nid to add black markers cause its kinda messy, and i use the 3M tape for that and paint….
ehh…
Now I’m Having trouble deciding to buy the Endless Waltz Series or Sinanju Titanium Finish… >_<
Any Suggestions?
Just buy a regular Sinanju if you’re planning to paint it. The titanium finish is useless if you’re painting it anyway. :)
I’m starting to think this kit hates me. I got it for my birthday but couldn’t build it because I was home sick and my tools were at my dorm. The night I finally do get my tools and build the kit, the peg connecting the torso to the hips breaks. I’ve tried everything to put it back together and today when I tried super glue, it ended up all over my fingers. Should I just buy another and use what I can from the old one as spare parts, or abandon the Sinanju altogether?
GG Infinite has a replacement parts program you could use! If you want to get serious about reconnecting the broken parts, you could drill a small hole in each end of the broken halves, then put a small metal rod in there when you glue them back together to make everything more stable. You could also use model glue, which will chemically melt the two parts together. In the worst case scenario you could buy a whole new Sinanju, but whatever you do, abandoning a kit should NEVER be an option!
I’m starting to build my Sinanju and I have a question regarding the color choice. What’s the difference between clear red and flat red and which one should I use for the majority of the Sinanju?